 Physically clean computer inside and out. Visually inspect fans and electronic components for signs of arcing, discoloration, physical damage or bulging capacitors.
Check all fans for free rotation and clean excessive dirt on blades and heatsink fins.
Disclaimer included below. Opening your computer case could void your warranty, and expose you to possible electric shock. Please be careful.
MAKE SURE you touch something metal to ground yourself before you open the case and reach in there. Even the slightest static electricity zap can ruin a computer chip. This step is especially important if you live in a dusty place like Wyoming.
Table of Content
- Clean the Keyboard
- Clean the Mouse
- Clean Exterior of Computer
- Clean Interior of Computer Case
- Update Device Drivers
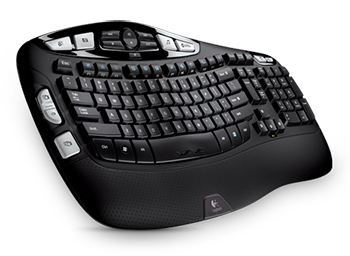 Clean the Keyboard
If you use a computer in your home or office, your keyboard is probably the most germ infected item you’ll come in contact with. It will usually contain more bacteria than your toilet seat, so reducing the amount of dangerous bacteria on your keyboard is good enough reason alone for regularly cleaning your keyboard.
But excess dirt, dust and hair, not to forget staples and paperclips, can also cause your keyboard to act up, with stuck keys, keys that don’t work, keys that type the wrong character, or it might not work at all.
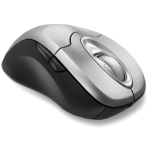 Clean the Mouse
If you use a computer in your home or office, your mouse is probably one of the most germ infected items you’ll come in contact with. It may even contain more bacteria than your toilet seat, so reducing the amount of dangerous bacteria on your mouse is good enough reason alone for regularly cleaning your mouse.
But a dirty mechanical mouse (mouse with a ball) can cause your mouse to move the cursor in only one axis or direction (meaning a roller is dirty). But if the mouse is erratic and hard to control, it usually means the rollers are wrapped in lint.
 Clean Exterior of Computer
Cleaning a PC is a relatively simple process. Time should be taken at least quarterly to check the cleanliness of your PC. If you are uncomfortable or unfamiliar with taking a PC apart, a simple procedure can check whether your PC is in need of internal cleaning or not. Make sure to adequately ground yourself to eliminate the destructive static electricity that can damage internal components as well.
Look at the rear of the main PC box (either your desktop or tower case). You will see a grated circular (or in some cases square) hole covering a fan. Is the grating clogged with dust, dirt, hair or other foreign material? If so, your CPU is most likely in need of cleaning.
Be aware of your health too, since when you first let loose with the compressed air, you are going to create a huge cloud of nastiness which you want to avoid breathing in. Goggles might be a good idea here too. Generally speaking, you will be simply trying to remove as much of the visible dust as possible.
Caution: DO NOT SPRAY COMPRESSED AIR INTO THE CPU, FLOPPY OR CD. This can damage or misalign the internal components, causing the drive to fail when reading media. Also, do not spray compressed air into the case/power supply at the rear of the CPU.
The outside of the case can be cleaned with an all-surface cleaner such as Formula 409 or Windex. DO NOT DIRECTLY SPRAY CLEANERS ONTO THE CASE. Rather, spray the cleaner on a lint-free towel, then wipe down the front and sides of the case, taking special care to avoid the operating doors of the CD-ROM, floppy drive and any other bay-mounted devices.
Clean Interior of Computer Case
Carefully take the cover off the CPU (Central Processing Unit). Use a vacuum or canned air to carefully clear out the dust that collects in a case and can clog up the fans. The dust you see accumulating on the rear fan grate was drawn through vents at the front of the PC, traveled through the PC (depositing some on the internal components) then was drawn through the power supply and pushed out the rear. If you blow dust into the case, there is more to accumulate on the expensive components inside the PC. Internal dust and other foreign material can cause overheating and eventually will lead to component failure.
 Fan problems are by far the most common age-related computer maintenance issue. Fans are essential to your PC’s well being, and they will cease to run eventually, unless you work in an immaculately clean room. The higher off the floor you place the CPU, the better the airflow in and out of the case, and the longer the fans are going to last. If you place your CPU on the floor and allow pets and cigarette smoke in the room, your fans may need cleaning more often.
If fans are constantly whirring, drawing dust, fibers, and all manner of airborne debris inside the case. Every six months or so, it can be smart to open the PC and take a look inside. Verify that all the fans are working; clean the vents, the fan blades, and heatsinks, etc.
If you keep your computer in a dusty environment, you should consider a “spring” cleaning more than once a year.
 Computer housekeeping is really a snap. A little diligence will keep your computer clutter-free and speedy. To help with keeping track of your maintenance schedule, you can download this maintenance schedule (Microsoft Excel) and modify according to your particular use.
How to Clean Inside of a Computer
Is your computer making noises or humming? Is dust collecting visibly on the external fan surface? Have you gone more than two months without cleaning the inside properly? Dust inside your computer can lead to component failure, fan failure, and slow performance. Keep your machine running smoothly and safely by taking the time to dust the interior. Don’t wait until a fan dies and your machine overheats!
Retrieve necessary tools. You will need to have a can of compressed air or a small air compressor, plus a screwdriver if you must remove screws to open your machine. A small vacuum might come in handy for cleaning up the mess you make around the computer, but should never be used inside it. Wearing a dust mask is optional, but can save you a bit of sneezing if your machine is over due for cleaning
Shut down your machine. Turn off your computer and any surge protectors or alternate power sources it may be connected to. Most computers also have a “master power switch” on the back. Although the majority of users simply leave this switch on, flip it to the off position for extra safety.
Disconnect all peripherals. After your machine is shut down, unplug all cables connecting it to external components and power sources. Do not leave any cables connected to your computer while cleaning it, especially the power cord and the monitor cable.4. Move to a suitable work area. If you have not cleaned your computer in a while (or ever), it would be a good idea to move to a suitable workspace. While you can clean your computer where it sits, this usually isn’t ideal. Despite what you might assume, the job can be very messy and you’ll want to work somewhere where you can adequately ventilate dust.
Open your machine. Once you have a suitable workplace, open your computer. This will vary greatly depending on your machine. If you have a user’s manual, consulting it would be a good idea. Most machines have screws holding a side panel down. After removing these, you can then slip the side off your machine.
Prepare to clean. After opening the computer, get your can of compressed air, or ready your air compressor. Additionally, you might want to wear a dusk mask. Never touch the inside of your computer unless it is absolutely necessary. You may discharge a static shock to vital internal components and damage them. If you must touch the inside of your machine, discharge any static by tapping your finger to the computers metal case before unplugging it.
Begin dusting. Use your compressed air to blow out the inside of the your machine. It is usually a good idea to start on the upper region of the computer, then work your way down. In this manner you can sweep out all the dust that settles on lower components in one run. Do not worry if you cause the blades of internal fans to spin. This is expected and it is important to keep these components clean. Be thorough, but do not press on cords or components. Also keep your air source a moderate distance from the component you’re working on.
- NOTE: Always hold your can of compressed air upright. If inverted, it can be let out as a liquid which can cause severe damage to your computer.
 Make sure the Heat Sink fan is clean. The heat sink sits over the Processor, and it is a collection of metal ridges that stick up away from the Motherboard. If this fan does not function properly, the processor will overheat and possibly be ruined.
Look around the entire inside and outside for any dust you may have missed. Once you are sure it is cleaned thoroughly, carefully replace the sides. Do not try to force them into place.
Clean up your work space. The initial run will churn up a lot of particulates. Depending on your workspace, you may need to get a small vacuum and clean the area around the computer. Do not use a vacuum on the inside of the computer. You might want to consider leaving your machine open while you do this. Airborne dust inside the computer will begin to settle and you can make your effort exceptionally productive if you make a second run.
Close your machine. After you’ve finished dusting, replace the side of your machine and any screws. Once the machine is tightly shut, return it to its usual spot and reattach the power cord and other cables. (You might consider cleaning this entire area to remove excess materials that can contribute to dust intake.) If you flipped the master power switch on the back of your machine off, be sure to turn it on again or your machine will not start. A clean computer will run significantly cooler and last much longer than a computer clogged up with dust and debris.
Update Device Drivers